Printer Alignment Test Page
Print this alignment reference to compare skew, offset margins, doubled/shifted lines and geometry through the normal browser/driver path. Use the printer's own alignment, calibration or registration pattern to confirm a hardware-specific adjustment.
Tip: To save this test page as a PDF, click the print button and choose “Save as PDF” as the destination in your browser’s print dialog. Set paper size to A4 or Letter and keep margins at default.
- Use 100% scale
- Turn off “fit to page” if available
- Print in color for color sheets
Download the PDF version for A4 or Letter paper, or print directly from this page.
Printer Alignment Test Page
1 · Corner & Center Crosshair Marks
All five crosshairs should remain centered and visually consistent. The dashed frame should sit parallel to the paper edges.
2 · Center Grid
Grid squares should look uniform at 100% scale. Distortion can come from scaling, rendering, feed behavior or printer-specific geometry.
3 · Horizontal & Vertical Line Tests
Horizontal lines should print straight with no waviness; vertical lines should be parallel and evenly spaced with no doubling.
4 · Diagonal Line Tests
Diagonal lines make stair-stepping, doubling and breaks easy to see. Compare scaling first, then the printer's own alignment/calibration pattern if the symptom persists.
5 · Ruler Measurement Marks
Tick marks provide a spacing reference. Uneven measured spacing can reflect browser scaling, driver geometry, feed variation or other model-specific factors.
6 · Border Alignment Frame
Frame gap should be equal on all four sides
7 · After-Print Checklist
How to Use This Printer Alignment Test Page
This page makes geometry and line-placement symptoms easier to reproduce, but browser scaling and paper feed can imitate alignment problems. Use the following sequence to compare the result without jumping directly to a hardware conclusion:
Print the sheet
Click the print button. Use default margins and 100% scale — do not enable "fit to page", which would distort the measurements.
Check the frame first
Look for tilt or uneven margins, then confirm that the browser used 100%/actual-size printing. Paper guides, printable margins and feed behavior can all affect the result.
Inspect lines closely
Look for doubled vertical lines, uneven spacing or stair-stepped diagonals. These patterns can justify checking the printer's alignment/calibration routine, but they are not proof of one failed component.
Confirm with the printer
If the symptom persists at 100% scale, print the model's own alignment/calibration/registration pattern and follow its instructions. Then reprint this same reference for comparison.
What to Check After Printing
- Skewed frame: a tilted frame justifies checking paper loading/guides and the printer's own feed/alignment diagnostics after ruling out scaling.
- Offset margins: a straight but off-center frame can reflect printable margins, application/driver settings, scaling or printer alignment. Compare an internal test page before adjusting hardware.
- Doubled or ghosted lines: doubled verticals can support an inkjet alignment investigation, but rendering, feed and other printer-specific causes should be ruled out with the built-in pattern.
- Wavy horizontal lines: waviness can involve media, feed behavior, printhead motion, scaling/rendering or other model-specific factors.
- Stair-stepped diagonals: jagged diagonals can support an alignment investigation after ruling out scaling/rendering effects that also blur everyday text.
- Uneven ruler ticks: drifting spacing is worth measuring, but browser/driver scaling and feed geometry must be separated before blaming a mechanical part.
Alignment Examples: Reference vs Misregistration
Compare centered targets and clean registration with a photographed example where colored alignment elements no longer sit together cleanly.
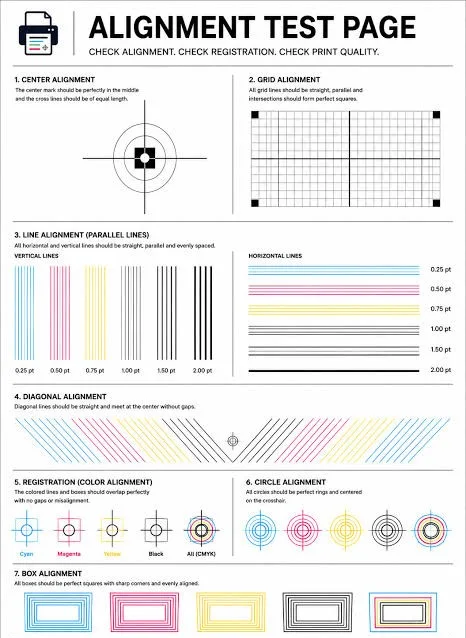
This is an illustrative alignment reference. Lines should remain straight, grids square and registration targets centered when the printer and scaling are behaving correctly.
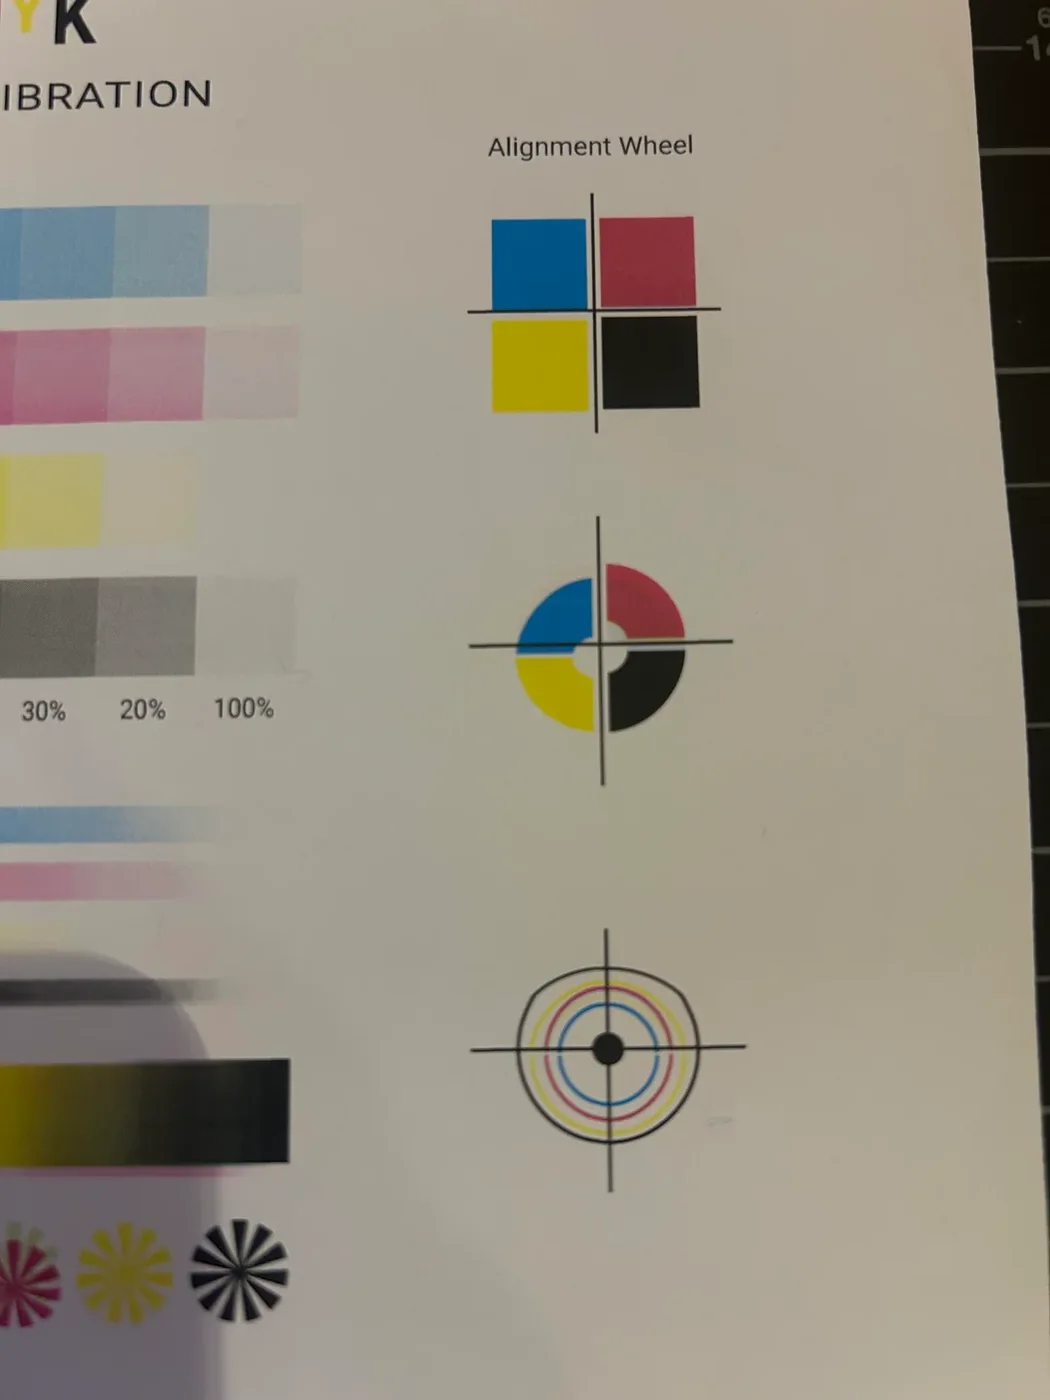
Colored targets and fine alignment elements appear offset rather than cleanly registered. Use this as a visual symptom example; the exact alignment or calibration procedure still depends on the printer model.
Why Printer Alignment Matters
Inkjet alignment affects how print passes and color/black elements register, while laser printers can have separate paper-skew and color-registration behaviors. Doubled text, shifted lines or tilted frames can justify checking those systems, but browser scaling, paper loading and rendering can produce similar-looking output.
Some printers provide automatic alignment, calibration or registration, while others use a printed pattern, scanner or driver utility. Follow the exact model procedure and compare this page before and after. If the printer's own alignment report is acceptable but browser output still looks wrong, investigate scaling, driver/rendering, media and broader print-quality causes rather than assuming another alignment cycle is needed.
Frequently Asked Questions
Doubled or shifted text/lines, jagged geometry and visibly offset registration can justify checking alignment, but first rule out browser scaling and compare the printer's own alignment or calibration pattern.
Use the alignment, calibration or registration procedure documented for your exact printer model. The workflow varies by technology and may use an automatic routine, a printed pattern, a scanner or a driver utility. Reprint the same reference afterward for comparison.
No. Keep the scale at 100% and use default margins. Scaling changes the geometry of the grid and ruler marks, which makes offset and skew measurements unreliable.
Not necessarily. First confirm 100%/actual-size printing, reload the paper squarely and check the side guides. If the printer's own internal page is also skewed, follow the model-specific feed/alignment troubleshooting rather than assuming one worn part.